
Posted by TJ Hopkins on Jul 5th 2026
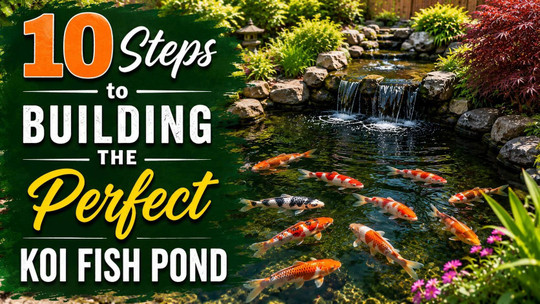
10 Steps to Building the Perfect Koi Fish Pond
A well-designed koi pond can transform an ordinary backyard into a peaceful retreat while providing a healthy environment for colorful, long-lived koi. Unlike a simple water garden, a koi pond requires proper planning, filtration, and ongoing maintenance to keep fish thriving year-round.
Whether you're building your first pond or upgrading an existing one, these ten steps will help you create a beautiful, low-maintenance koi pond that will provide enjoyment for decades.
1. Choose the Right Location
The location of your pond plays a major role in its long-term success.
Look for an area that:
- Receives 4–6 hours of sunlight daily
- Has some afternoon shade during hot summers
- Is away from large trees that drop leaves
- Has access to electricity and a garden hose
- Is visible from your patio, deck, or favorite outdoor seating area
Avoid low areas where rainwater may wash fertilizer or chemicals into the pond.
Tip: Always call your local utility locating service before digging.
2. Determine the Pond Size
Koi grow much larger than most people expect.
Many healthy koi reach:
- 18–24 inches long
- Some exceed 30 inches
- Can live 25–50 years with proper care
A quality koi pond should generally be:
- At least 1,000 gallons
- 3–5 feet deep
- Large enough for future fish growth
More water equals more stable temperatures and better water quality.
3. Design the Pond Shape
Think about both beauty and functionality.
Popular designs include:
- Natural freeform ponds
- Formal rectangular ponds
- Kidney-shaped ponds
- Japanese-inspired ponds
Include features like:
- Viewing areas
- Gentle waterfalls
- Streams
- Bridges
- Stone edging
- Plant shelves (if desired)
Avoid overly shallow shelves that predators can easily access.
4. Excavate the Pond
Mark the outline with a garden hose or landscape paint before digging.
While excavating:
- Remove sharp rocks
- Create smooth sidewalls
- Maintain consistent depth
- Build a slightly deeper area for winter protection
The smoother the excavation, the easier it will be to install the liner.
5. Install the Underlayment and Pond Liner
Never place a liner directly against bare soil.
Instead use:
- Geotextile underlayment
- Old carpet (non-treated)
- Commercial pond padding
Then install a high-quality EPDM rubber liner.
Benefits include:
- Flexible
- UV resistant
- Fish safe
- Long lifespan
- Easy to repair if damaged
Take your time removing wrinkles before filling the pond.
6. Add Filtration and Water Circulation
Filtration is the heart of every successful koi pond.
Most ponds require:
Mechanical Filtration
Removes:
- Leaves
- Fish waste
- Debris
Biological Filtration
Beneficial bacteria convert:
- Ammonia
- Nitrite
- Into safer nitrate
Pump
Choose a pump capable of circulating the pond's entire volume every 1–2 hours.
Aeration
Add:
- Air pumps
- Diffusers
- Waterfalls
- Fountains
Healthy oxygen levels are critical for koi.
7. Install Rocks, Gravel, and Water Features
Decorative elements make the pond look natural.
Popular additions include:
- Boulder edging
- River rock
- Waterfalls
- Bubbling fountains
- Small streams
- Decorative bridges
- Japanese lanterns
Avoid sharp rocks where koi may injure themselves.
8. Fill the Pond and Treat the Water
Use fresh water to fill the pond.
Before adding fish:
- Remove chlorine
- Neutralize chloramine
- Test pH
- Test ammonia
- Check water hardness
Allow the filtration system to operate for several days while beneficial bacteria become established.
Patience during this stage prevents many future problems.
9. Introduce Healthy Koi Slowly
Never overcrowd your pond.
A general guideline is:
- Approximately one mature koi per 250 gallons of water
Before releasing fish:
- Float the transport bag for 20–30 minutes
- Slowly mix pond water into the bag
- Gently release the koi
Feed lightly during the first week while they adjust.
10. Maintain Your Pond Year-Round
Routine maintenance keeps koi healthy and the pond looking its best.
Weekly tasks:
- Remove leaves
- Clean skimmer baskets
- Test water quality
- Check pumps
- Inspect filters
Monthly:
- Partial water changes
- Trim aquatic plants
- Vacuum excess debris if needed
Seasonally:
- Prepare for winter
- Restart equipment in spring
- Monitor algae growth in summer
- Remove falling leaves in autumn
Consistent maintenance prevents expensive repairs and keeps your pond crystal clear.
Common Mistakes to Avoid
Many new pond owners make a few common mistakes that can lead to poor water quality or unhealthy fish.
Avoid:
- Building the pond too shallow
- Buying too many koi too soon
- Skipping biological filtration
- Overfeeding fish
- Ignoring water testing
- Using undersized pumps
- Allowing runoff from lawns into the pond
Learning these lessons early can save time, money, and frustration.
Bonus Features to Consider
Once your pond is established, you can enhance it with additional features such as:
- LED underwater lighting
- Automatic fish feeders
- UV clarifiers for algae control
- Decorative bridges
- Water lilies
- Lotus flowers
- Bog filtration systems
- Seating areas
- Outdoor landscape lighting
These upgrades improve both the appearance and enjoyment of your pond.
Final Thoughts
Building the perfect koi fish pond takes thoughtful planning, quality materials, and regular care, but the results are well worth the effort. A properly designed pond provides a healthy habitat for koi while creating a peaceful focal point that enhances your outdoor living space. By following these ten steps, you'll build a pond that remains beautiful, balanced, and enjoyable for many years to come.