
Posted by TJ Hopkins on Aug 22nd 2026
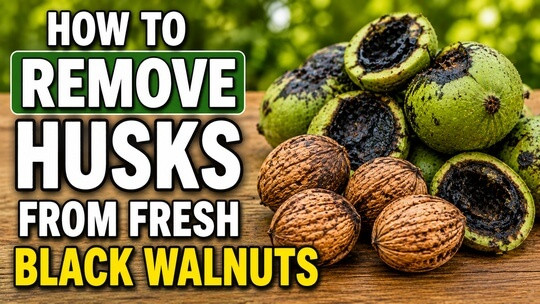
How to Remove Husks From Fresh Black Walnuts
Fresh black walnuts are a rewarding fall harvest, but anyone who has gathered them knows there is some work involved before you reach the hard shell—and eventually the delicious nutmeat inside. The thick green outer husk must be removed soon after harvesting, and it can be messy.
Fortunately, dehusking black walnuts is fairly simple once you know what to do. This guide explains how to remove husks from fresh black walnuts, clean the nuts, cure them, and prepare them for storage or cracking.
When Are Black Walnuts Ready to Harvest?
Black walnuts (Juglans nigra) typically mature in late summer through fall, depending on your location and weather conditions. Many are ready to harvest in September and October.
Ripe walnuts often fall naturally from the tree. The outer husk is initially green but gradually becomes yellow-green, brown, or black as it ages.
A walnut is usually ready for dehusking when the outer covering can be dented with firm thumb pressure. If the husk is extremely hard and completely green, it may benefit from a little more time to mature.
Collect fallen walnuts frequently. Nuts left on wet soil for long periods may deteriorate, and old husks become increasingly messy as they break down.
Why Should You Remove Black Walnut Husks Quickly?
It's best to remove the husks soon after collecting your walnuts.
As the outer husk decomposes, it becomes soft, dark, and extremely messy. Leaving walnuts inside deteriorating husks for an extended period can also affect the quality of the nut.
Prompt dehusking makes the rest of the cleaning and curing process much easier.
Wear Gloves Before Handling Black Walnuts
Before getting started, put on a sturdy pair of gloves.
Black walnut husks contain dark pigments that can stain your hands, clothing, tools, concrete, and other surfaces. The stains can be difficult to remove and may remain on skin for days.
Old clothing and work shoes are also recommended. Choose an outdoor work area where staining won't be a major concern.
Method 1: Remove the Husks by Hand
If the walnuts are fully ripe and the husks have softened, you may be able to remove them manually.
Wearing gloves, press firmly against the husk and peel or pull it away from the shell. A small knife or other sturdy hand tool can help loosen stubborn sections, but use caution to avoid slipping and cutting yourself.
Hand removal works particularly well when you only have a small quantity of walnuts.
Method 2: Roll the Walnuts Under Your Foot
Another simple method is to place individual walnuts on a firm outdoor surface and carefully roll them beneath the sole of a sturdy shoe.
Apply enough pressure to loosen and split the husk without trying to crush the walnut itself.
Once the husk separates, pick up the walnut while wearing gloves and remove any remaining pieces.
Avoid doing this on finished concrete, patios, decks, or other surfaces you don't want stained.
Method 3: Use a Board for Larger Quantities
A sturdy board can make processing multiple walnuts easier.
Place a walnut on the ground or another appropriate work surface and use the board to apply controlled rolling pressure. The pressure helps break and loosen the outer husk.
Remove the loosened material by hand and repeat with the remaining walnuts.
This method can be faster than individually peeling a large harvest.
What to Do With the Removed Husks
Collect the husks as you work instead of allowing them to accumulate around your yard.
Black walnut material contains juglone and other compounds associated with the tree's natural chemical defenses. Rather than spreading large amounts of fresh husk material directly around sensitive garden plants, dispose of or compost it thoughtfully.
Keeping your dehusking area clean also prevents the dark husk material from being tracked onto sidewalks, patios, or indoor floors.
Wash the Black Walnuts
After removing the husks, the walnut shells will probably still be covered with dark fibers, pulp, and stains.
Rinse the walnuts thoroughly with water.
A stiff brush can help scrub away material clinging to the shells. Continue rinsing until most loose husk residue has been removed.
Don't worry if the shells remain dark or stained. Black walnut shells naturally become darker during processing.
Check the Walnuts Before Curing
This is a good opportunity to inspect your harvest.
Discard nuts that are badly cracked, damaged, rotten, or obviously deteriorated. Also watch for signs of insect damage.
You can also place walnuts in water while washing them. Floating nuts may be poorly filled, damaged, or otherwise lower quality, although floating alone isn't a perfect test of whether a walnut is usable.
Let the Walnuts Dry
Once washed, spread the walnuts out so surface moisture can dry.
Avoid leaving freshly washed walnuts in deep piles or sealed containers. Good airflow helps reduce the chance of mold developing.
A screen, wire rack, or shallow ventilated tray can work well.
Cure Black Walnuts Before Cracking
Freshly harvested black walnuts benefit from a curing period before they are cracked and eaten.
Arrange the cleaned walnuts in shallow layers in a cool, dry, well-ventilated location protected from rain and wildlife.
Allow them to cure for approximately two to three weeks.
Proper curing helps reduce moisture and improves their suitability for storage and cracking.
Protect Your Walnuts From Squirrels
If you're drying walnuts outside or in an open shed, don't underestimate squirrels.
Black walnuts are an excellent wildlife food, and squirrels may quickly discover an unprotected harvest.
Use screens, hardware cloth, or another ventilated barrier that allows airflow while preventing animals from reaching the nuts.
How to Store Black Walnuts
After the walnuts are properly cured, you can store them in their shells until you're ready to crack them.
Keep unshelled walnuts somewhere cool and dry with good airflow. Avoid warm, damp areas that encourage mold.
For longer storage after cracking, refrigerating or freezing the nutmeats is generally preferable because walnuts contain oils that can eventually become rancid.
How to Crack Black Walnuts
Removing the husk is only the first challenge. Black walnuts have exceptionally hard shells.
An ordinary lightweight nutcracker may not be strong enough. A heavy-duty nutcracker designed for black walnuts or a carefully used hammer and sturdy cracking surface may work better.
Wear eye protection when cracking the shells because small shell fragments can fly.
Crack the shell gradually rather than smashing it completely. Carefully removing shell sections can make it easier to extract larger pieces of nutmeat.
Are Black Walnuts Worth the Work?
For many people, absolutely.
Black walnuts have a distinctive, rich flavor that is noticeably different from the milder English walnuts commonly sold in grocery stores. They can be eaten on their own or used in baked goods, breads, cookies, cakes, candies, and other recipes.
Harvesting them also turns something that might otherwise be left scattered across the lawn into a useful seasonal food.
Tips for Dehusking Black Walnuts
- Always wear gloves when handling fresh husks.
- Wear clothing and shoes you don't mind staining.
- Harvest fallen walnuts regularly.
- Remove the husks soon after harvesting.
- Work outdoors on a surface that can tolerate staining.
- Wash away loose husk material after dehusking.
- Allow plenty of airflow while drying and curing.
- Protect curing walnuts from squirrels and other wildlife.
- Discard obviously moldy, rotten, or badly damaged nuts.
- Wear eye protection when cracking cured walnuts.
Final Thoughts
Learning how to remove husks from fresh black walnuts makes harvesting these native nuts much less intimidating. The process is messy, but the basic steps are straightforward: collect ripe walnuts, remove the outer husks, wash the shells, dry them, and allow the nuts to cure before cracking.
The biggest thing to remember is that black walnut husks stain almost everything they touch. Gloves, old clothing, and a suitable outdoor workspace can save you considerable cleanup.
With a little patience, those green husks hiding beneath a black walnut tree can eventually become flavorful nutmeats ready for baking, cooking, or enjoying on their own.