
Posted by TJ Hopkins on Aug 12th 2026
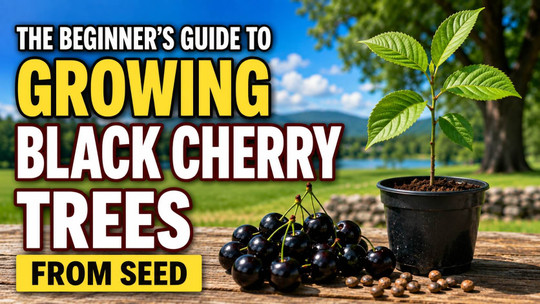
The Beginner’s Guide to Growing Black Cherry Trees from Seed
Growing a black cherry tree from seed is a rewarding way to add a beautiful native tree to your landscape. Known botanically as Prunus serotina, the black cherry is valued for its attractive foliage, fragrant spring flowers, dark summer fruits, wildlife benefits, and impressive mature size.
Black cherry trees are native to much of eastern North America and can eventually become substantial shade trees. Although starting them from seed requires patience and proper preparation, the process is manageable even for beginners.
This guide explains how to prepare, stratify, plant, and care for black cherry seeds from germination through the seedling stage.
About Black Cherry Trees
Black cherry is a fast-growing deciduous tree belonging to the rose family. Mature trees develop an attractive rounded or irregular crown and distinctive dark bark that becomes increasingly scaly with age.
Small white flowers appear in elongated clusters during spring. These are followed by small cherries that gradually ripen to a deep reddish-purple or nearly black color.
The fruits are especially valuable to wildlife. Birds and mammals feed on them and help disperse the seeds naturally.
Black cherry trees generally perform best in USDA Hardiness Zones 3 through 9, although local climate and growing conditions can influence their success.
Why Grow Black Cherry Trees from Seed?
Growing trees from seed takes longer than purchasing established nursery trees, but it has several advantages.
Seeds are convenient when you want to grow multiple trees, experiment with native tree propagation, establish wildlife habitat, or simply enjoy watching a tree develop from its earliest stage.
Seed-grown black cherry trees can be used for:
- Native landscapes
- Wildlife gardens
- Large yards
- Woodland restoration
- Naturalized areas
- Windbreaks and buffers
- Shade trees
- Bird-friendly landscapes
Because black cherry eventually becomes a large tree, choose its permanent location carefully.
Step 1: Start with Viable Black Cherry Seeds
Begin with mature, properly stored black cherry seeds. If collecting your own fruit, gather fully ripened cherries from healthy trees.
Remove the fleshy fruit surrounding the pits and wash them thoroughly. Any remaining fruit material can encourage mold while the seeds are being stored or stratified.
Seeds purchased specifically for propagation may already be cleaned and ready for pretreatment.
Step 2: Soak the Seeds
Before stratification, soaking the cleaned seeds in water for approximately 12 to 24 hours can help hydrate them.
Place the seeds in a container of room-temperature water. After soaking, remove them and prepare them for cold stratification.
Soaking alone usually will not cause black cherry seeds to germinate. Their natural dormancy normally requires an extended cold period.
Step 3: Cold Stratify Black Cherry Seeds
Cold stratification is one of the most important parts of growing black cherry trees from seed.
In nature, cherries fall to the ground and experience cool, moist winter conditions before germinating. You can imitate this natural cycle in your refrigerator.
Mix the seeds with a slightly moist growing medium such as:
- Peat moss
- Vermiculite
- Sand
- Seed-starting mix
The medium should be moist but never dripping wet.
Place the mixture and seeds inside a resealable plastic bag or suitable container. Label it with the species and starting date.
Store the seeds in a refrigerator at approximately 33°F to 41°F.
Black cherry seeds commonly benefit from roughly 90 to 120 days of cold, moist stratification.
Check them occasionally. The growing medium should remain slightly moist, and any signs of excessive mold should be addressed promptly.
Step 4: Prepare Your Containers
As the stratification period approaches completion, prepare containers for planting.
Black cherry seedlings develop roots quickly, so deeper pots are preferable when available. Containers must have adequate drainage holes.
Fill them with a loose, well-draining seed-starting mixture.
Moisten the growing medium before planting so it is evenly damp without becoming waterlogged.
Step 5: Plant the Seeds
Remove the seeds from cold stratification and plant them approximately 1/2 to 1 inch deep.
You can plant one seed per container or use larger containers with adequate spacing between seeds.
Cover the seeds lightly with the growing medium and water gently.
Keep the soil consistently moist during germination, but avoid saturated conditions.
Step 6: Provide Warmth and Light
After planting, place the containers in a warm location with bright light.
A temperature around 65°F to 75°F is generally suitable for germination and early seedling development.
A humidity dome can help maintain consistent moisture while the seeds are germinating. Provide some ventilation and remove the dome once seedlings become established.
Never allow the growing medium to completely dry out during this stage.
Step 7: Be Patient During Germination
Black cherry seeds do not necessarily germinate simultaneously.
Even after proper stratification, some seeds may emerge considerably earlier than others. Continue caring for apparently ungerminated containers rather than immediately assuming the seeds have failed.
Seed germination is naturally variable and depends on seed viability, dormancy, temperature, moisture, and other growing conditions.
Step 8: Give Seedlings Plenty of Light
Once seedlings emerge, adequate light becomes extremely important.
Place young trees in a bright location where they can develop strong, compact growth. If growing seedlings indoors, supplemental grow lights can be helpful when natural sunlight is insufficient.
Gradually introduce indoor-grown seedlings to stronger outdoor sunlight rather than moving them immediately into intense full sun.
Step 9: Water Young Black Cherry Seedlings Carefully
Young seedlings need consistent moisture while establishing their root systems.
Water when the upper portion of the growing medium begins to dry. Water thoroughly enough to moisten the root zone, and allow excess water to drain freely from the container.
Avoid keeping pots constantly saturated.
Poor drainage and excessive watering can contribute to root problems and seedling loss.
Step 10: Transplant Your Black Cherry Tree
Once your seedling has developed a healthy root system and is large enough to handle, it can eventually be transplanted into a larger container or its permanent outdoor location.
Select a location with plenty of room.
Black cherry trees can eventually reach approximately 50 to 80 feet tall, with exceptional trees becoming even larger. Avoid planting them beneath utility lines or immediately beside buildings.
They perform particularly well in full sun and fertile, well-drained soil.
Dig a planting hole approximately as deep as the root system and wider than the root mass. Position the young tree at approximately the same soil level at which it was previously growing.
Backfill gently and water thoroughly.
Hardening Off Seedlings Before Planting Outdoors
Seedlings grown indoors should be hardened off before permanent outdoor planting.
Begin by placing them outside in a protected location for a short period each day. Gradually increase their exposure to sunlight, wind, and outdoor temperatures over approximately one to two weeks.
This gradual transition reduces transplant stress.
Choosing the Best Location
Black cherry trees tolerate a range of conditions, but selecting a favorable site will encourage stronger growth.
For best results, provide:
Sunlight: Full sun to partial shade
Soil: Fertile, moist, well-drained soil
Drainage: Good drainage is important
Space: Allow plenty of room for the mature canopy and root system
Water: Regular moisture while young, especially during dry periods
Trees grown in full sun generally develop fuller crowns than trees growing under heavy shade.
Caring for a Young Black Cherry Tree
Newly transplanted seedlings require extra attention during their first few growing seasons.
Water deeply during prolonged dry weather. Applying a layer of organic mulch around the root zone can help retain soil moisture and reduce competition from weeds.
Keep mulch several inches away from the trunk rather than piling it directly against the bark.
Protect small seedlings from lawn equipment, deer, rodents, and other potential damage.
As the tree becomes established, it should require considerably less attention.
Black Cherry Trees and Wildlife
One of the biggest benefits of growing black cherry is its wildlife value.
The flowers attract pollinating insects, while the fruits provide food for numerous bird species and mammals. Black cherry also serves as a host plant for the caterpillars of several butterfly and moth species.
Adding black cherry to a suitable landscape can therefore contribute to a more diverse backyard ecosystem.
Common Problems When Growing Black Cherry Seeds
Seeds Don't Germinate
Insufficient stratification is a common reason for poor germination. Make sure seeds receive an adequate period of cold, moist conditions.
Some seeds simply may not be viable, so starting several seeds improves your chances of obtaining healthy seedlings.
Mold During Stratification
Too much moisture can encourage mold. The stratification medium should be damp rather than saturated.
Check stored seeds periodically and provide clean conditions throughout the process.
Seedlings Become Tall and Weak
Long, thin seedlings frequently indicate inadequate light.
Move seedlings to a brighter location or provide appropriate supplemental lighting.
Leaves Turn Yellow
Yellowing can have several causes, including excessive watering, poor drainage, nutrient problems, or environmental stress.
Check soil moisture and drainage before automatically adding fertilizer.
Can You Plant Black Cherry Seeds Directly Outdoors?
Yes. Black cherry seeds can also be planted outdoors and allowed to experience natural winter conditions.
Fall sowing allows nature to provide the cold period needed to help overcome dormancy.
However, outdoor seeds face additional challenges from rodents, birds, fluctuating weather, weeds, and inconsistent moisture.
Controlled refrigerator stratification gives gardeners more control over seed preparation and allows seedlings to be monitored closely.
How Long Does It Take to Grow a Black Cherry Tree from Seed?
Growing a mature black cherry tree is a long-term project, but young trees can grow relatively quickly once established.
The first several months are devoted to seed preparation, germination, and seedling development. After transplanting, growth rate will depend on sunlight, soil quality, moisture, climate, and competition from surrounding vegetation.
With favorable conditions, black cherry is considered a relatively fast-growing native tree.
Final Thoughts
Growing black cherry trees from seed requires patience, but the basic process is straightforward.
The key is to recreate the seasonal conditions the seeds would naturally experience. Give the seeds an adequate period of cold, moist stratification, plant them in well-draining soil, maintain consistent moisture, and provide young seedlings with plenty of light.
With proper preparation and care, a tiny black cherry seed can eventually develop into an impressive native tree that provides shade, spring flowers, summer fruit, and valuable habitat for wildlife for many years to come.