
Posted by TJ Hopkins on Sep 12th 2026
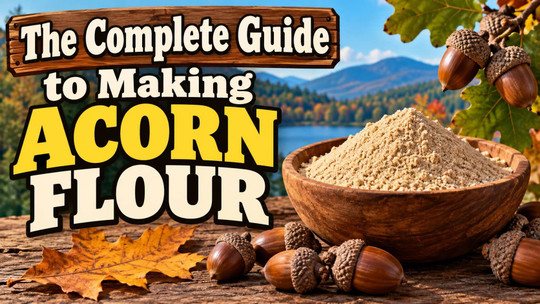
The Complete Guide to Making Acorn Flour
Acorns may look like ordinary nuts scattered beneath oak trees, but they can be transformed into a rich, naturally gluten-free flour. People have prepared acorns as food for thousands of years, using careful processing to remove their bitter tannins.
Making acorn flour requires patience, but the basic process is straightforward. You collect sound acorns, remove their shells, leach the nutmeat in water, dry it completely and grind it into flour.
Can You Really Eat Acorns?
Yes, properly identified and processed acorns are edible. However, raw acorns contain tannins that make them bitter and may cause digestive discomfort. They should never be turned directly into flour without first removing those tannins through a process called leaching.
Different oak species produce acorns with different flavors and tannin levels. Acorns from white oak species are usually sweeter and require less leaching. Red oak acorns tend to be more bitter and may need considerably more time in water.
Step 1: Identify the Oak Tree
Only collect acorns when you are certain they came from an oak tree. If you are unsure about the tree’s identity, consult a reliable tree identification guide or knowledgeable local expert before using the acorns as food.
It is also best to gather acorns from an area that has not been treated with pesticides or contaminated by roadside pollution.
Step 2: Collect Fresh Acorns
Collect mature acorns after they fall naturally from the tree in autumn. Look for firm, heavy acorns with intact shells.
Avoid acorns that have:
- Cracks or holes
- Dark, sunken areas
- Visible mold
- A sour or rotten smell
- Soft or shriveled shells
- Signs of insect damage
Gather more acorns than you think you will need because some will prove unusable after they are opened.
Step 3: Sort and Clean the Acorns
Remove the caps and rinse away dirt, leaves and other debris. Inspect every acorn carefully and discard anything visibly damaged.
Some people place whole acorns in a bowl of water as an initial sorting method. Floating acorns are more likely to be dried out, hollow or insect-damaged, but the float test is not perfect. Every acorn must still be inspected after shelling.
Step 4: Shell the Acorns
The acorns may be shelled immediately or allowed to dry briefly so that the shells become easier to crack. Use a nutcracker, small hammer or sturdy pliers to open them.
Remove the hard outer shell and any loose pieces of papery skin. The nutmeat inside should be cream-colored or light brown. Discard pieces that are moldy, blackened, soft, unusually spotted or damaged by insects.
Work in small batches if you have collected many acorns. Shelling is often the most time-consuming part of the process.
Step 5: Break Up the Nutmeat
Acorns will leach more efficiently when chopped or ground into smaller pieces. A food processor can reduce the nutmeat to a coarse meal.
Do not grind it into finished flour yet. Small granules allow water to reach more of the surface while remaining large enough to strain easily.
Step 6: Choose a Leaching Method
Leaching removes the bitter, water-soluble tannins. The process is complete only when the acorn meal tastes mild and nutty rather than bitter or astringent.
There are two common methods: cold-water leaching and hot-water leaching.
Cold-Water Leaching
Cold-water leaching takes longer, but it generally preserves more of the acorns’ natural starch. This can make the finished flour more useful for recipes where binding or thickening is important.
Place the coarse acorn meal in a large container and cover it generously with cold water. Refrigerate the mixture while it soaks.
Several times each day, carefully pour off the darkened water and replace it with fresh cold water. A very fine strainer or cloth bag can help prevent the acorn particles from washing away.
Depending on the oak species and the size of the pieces, cold-water leaching may take several days or longer. Keep changing the water until the meal no longer tastes bitter.
Hot-Water Leaching
Hot-water leaching is faster and works well when speed is important. However, repeated heating can change some of the starches and may affect how the flour performs in certain recipes.
Bring two pots of water to a boil. Add the acorn pieces to one pot and simmer them until the water becomes dark. Drain the acorns and immediately move them into the second pot of already-boiling water.
Continue alternating between pots of fresh hot water. Do not move hot acorns into cold water during this process, because the sudden temperature change may lock in some bitterness.
Continue until the acorns taste mild without producing a dry, puckering sensation in your mouth.
Step 7: Drain the Leached Acorns
Once the bitterness is gone, drain the acorn meal through a very fine strainer or clean cloth. Press out as much water as possible.
For cold-leached acorns, allow the mixture to settle before draining if you want to preserve the fine starch that collects near the bottom of the container.
Spread the damp meal into a thin, even layer for drying.
Step 8: Dry the Acorn Meal Completely
The acorn meal must be completely dry before storage. Any remaining moisture can encourage mold and spoilage.
You can dry it using:
- A food dehydrator on a low setting
- An oven set to its lowest safe temperature
- A warm, dry and well-ventilated location
Stir the meal occasionally so it dries evenly. When finished, it should feel dry and crumbly without any soft or damp pieces.
Avoid using excessive heat, which can scorch the meal and give the finished flour a bitter or burnt flavor.
Step 9: Grind the Dried Meal Into Flour
Place the completely dried acorn meal in a grain mill, high-powered blender, food processor or clean coffee grinder. Work in small batches and grind until it reaches the desired consistency.
For finer flour, sift the ground acorns through a fine-mesh sieve. Return the larger pieces to the grinder and process them again.
The finished flour should have a warm tan or light brown color and a pleasant, slightly nutty aroma.
Step 10: Store Acorn Flour Properly
Acorns naturally contain oils that can become rancid. Place the flour in a clean, airtight container and label it with the processing date.
For the best quality, store acorn flour in the refrigerator or freezer. Freezing is especially helpful if you have prepared a large batch or do not plan to use it quickly.
Discard the flour if it develops mold, moisture, an unpleasant odor or a sharp, rancid flavor.
How Does Acorn Flour Taste?
Properly leached acorn flour has a mild, earthy and nutty flavor. The exact taste depends on the species of oak and the method used to prepare the acorns.
If the finished flour still tastes noticeably bitter or leaves your mouth feeling dry, it needs additional leaching. Do not attempt to cover the bitterness with sugar or other ingredients.
How to Use Acorn Flour
Acorn flour does not contain gluten, so it behaves differently from ordinary wheat flour. In most baked goods, it works best when blended with wheat flour or another flour that provides more structure.
Try adding acorn flour to:
- Pancakes and waffles
- Muffins and quick breads
- Cookies
- Crackers
- Rustic breads
- Porridge
- Thick soups and stews
- Homemade pasta
- Pie crusts
When experimenting, begin by replacing approximately one-quarter of the recipe’s regular flour with acorn flour. You can adjust the amount after seeing how the flavor and texture develop.
Because acorn flour can absorb moisture differently from wheat flour, the recipe may need a little more liquid.
Important Safety Tips
Correct identification and careful processing are essential when preparing wild foods.
- Confirm that every nut is an acorn from an oak tree.
- Never use moldy, rotten or heavily insect-damaged acorns.
- Leach the acorns until all strong bitterness and astringency are gone.
- Keep cold-leaching acorns refrigerated.
- Dry the meal completely before grinding or storing it.
- Store the finished flour in an airtight container.
- Introduce acorn foods in a small quantity if you have never eaten them before.
- Avoid acorns if you have a relevant tree-nut allergy unless a medical professional says they are safe for you.
Is Making Acorn Flour Worth It?
Making acorn flour takes more work than buying ordinary flour, but the process can be deeply rewarding. It turns an abundant seasonal crop into a useful ingredient with a distinctive woodland flavor.
Your first batch does not need to be large. Start with a manageable quantity, take your time during leaching and taste the meal before drying it. Once you understand the process, you can prepare larger harvests and experiment with acorn flour in your favorite recipes.
With proper identification, thorough leaching and careful drying, fallen acorns can become a flavorful homemade flour that connects your kitchen to the oak trees growing around you.