
Posted by TJ Hopkins on Jul 17th 2026
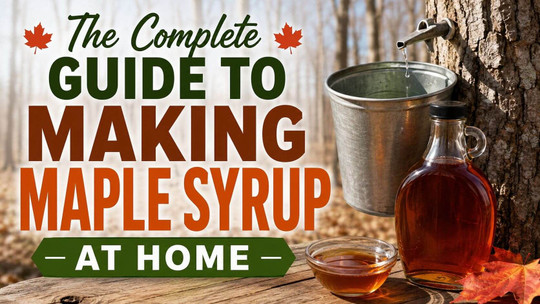
The Complete Guide to Making Maple Syrup at Home
There’s something incredibly satisfying about making your own maple syrup. With just a few basic tools, a healthy maple tree, and some patience, you can transform fresh maple sap into rich, golden syrup right in your own backyard. Whether you're looking for a fun family project or want to experience a traditional springtime activity, this guide will walk you through every step of the process.
Why Make Your Own Maple Syrup?
Homemade maple syrup offers several advantages:
- Fresh, rich flavor that's hard to beat
- A rewarding outdoor hobby
- Great family activity during late winter
- Learn traditional maple sugaring techniques
- Produce a natural sweetener with no additives
Best Trees for Maple Syrup
While several maple species produce sap, some are better than others.
Sugar Maple (Best Choice)
- Highest sugar content (2–3%)
- Produces the richest syrup
- Requires less boiling
Black Maple
- Similar to Sugar Maple
- Excellent syrup quality
Red Maple
- Slightly lower sugar content
- Still produces excellent syrup
Silver Maple
- Easier to tap
- More sap required due to lower sugar concentration
When to Tap Maple Trees
The ideal tapping season is:
- Late February through early April
- Daytime temperatures above freezing (40–45°F)
- Nighttime temperatures below freezing (20–30°F)
These freeze-thaw cycles create pressure inside the tree that causes sap to flow.
Choosing the Right Tree
Healthy trees produce the best sap.
Choose trees that are:
- At least 10–12 inches in diameter
- Healthy with a full canopy
- Free from major trunk damage
- Growing in sunny locations if possible
Larger trees can support multiple taps.
| Tree Diameter | Recommended Taps |
|---|---|
| 10–18 inches | 1 tap |
| 18–25 inches | 2 taps |
| 25–30 inches | 3 taps |
Equipment You'll Need
Basic maple syrup equipment includes:
- Maple tap (spile)
- Drill with 5/16-inch or 7/16-inch bit
- Hammer or mallet
- Collection bucket or sap bag
- Lid for bucket
- Food-grade storage containers
- Large outdoor boiling pan
- Heat source (wood fire, propane burner, or evaporator)
- Thermometer
- Filter
- Glass syrup bottles or jars
How to Tap a Maple Tree
Step 1: Drill the Hole
Drill a hole:
- 2 inches deep
- Slightly upward angle
- Into healthy wood
Avoid old tap holes.
Step 2: Install the Spile
Gently tap the spile into the hole using a rubber mallet.
Do not hammer too hard.
Step 3: Hang the Bucket
Attach your bucket or sap bag beneath the spile.
Cover it with a lid to keep out rain, insects, and debris.
Collecting Maple Sap
Fresh sap looks almost identical to water.
During a good run:
- One tap may produce 1–3 gallons per day.
- A healthy tree may produce 10–20 gallons over the season.
Collect sap daily whenever possible.
Store it cold until boiling.
How Much Sap Makes Syrup?
The average ratio is:
40 gallons of sap = 1 gallon of maple syrup
The exact amount depends on the sugar content of your sap.
Boiling the Sap
Boiling removes water and concentrates the natural sugars.
Important tips:
- Always boil outdoors due to heavy steam.
- Use a wide, shallow pan for faster evaporation.
- Add fresh sap gradually as the level drops.
- Never leave boiling sap unattended.
Boiling may take several hours depending on the amount of sap.
Knowing When It's Done
Finished maple syrup reaches:
- 219°F (104°C) at sea level
- About 7°F above the boiling point of water in your area
The syrup will also develop a rich amber color and thicker consistency.
Filtering the Syrup
Fresh syrup contains natural minerals called "sugar sand."
Filter while hot using:
- Syrup filters
- Orlon filters
- Cheesecloth (less effective)
Filtering improves appearance and shelf life.
Bottling and Storage
Bottle syrup while it's still hot.
Use:
- Sterilized glass bottles
- Mason jars
- Maple syrup containers
Store unopened syrup in a cool, dark place.
After opening:
- Refrigerate
- Use within several months
Tips for Better Maple Syrup
- Boil sap as soon as possible after collection.
- Keep collection buckets clean.
- Use only food-grade equipment.
- Filter syrup while hot.
- Tap healthy trees only.
- Remove taps at the end of the season—the tree will naturally heal.
Common Mistakes to Avoid
- Tapping trees that are too small
- Collecting dirty sap
- Letting sap sit too long before boiling
- Boiling indoors
- Overheating finished syrup
- Storing syrup in unsterilized containers
Frequently Asked Questions
Can I tap the same tree every year?
Yes. Healthy maple trees can be tapped annually if you use proper techniques and rotate tap hole locations.
Does tapping hurt the tree?
No. Healthy trees heal naturally after the tap is removed.
Can you drink maple sap?
Yes. Fresh maple sap is safe to drink and has a mildly sweet taste.
Which maple makes the sweetest syrup?
Sugar maple produces the highest sugar content and is the preferred choice for syrup production.
How long does homemade maple syrup last?
Unopened syrup can last for years when properly sealed. Once opened, refrigerate and use within several months.
Final Thoughts
Making maple syrup at home is one of the most rewarding ways to celebrate the arrival of spring. From tapping your first tree to pouring your finished syrup over pancakes, every step connects you with a tradition that has been enjoyed for generations. With a few simple tools and a little patience, you can create delicious, all-natural maple syrup straight from your own backyard.