
Posted by TJ Hopkins on Sep 20th 2026
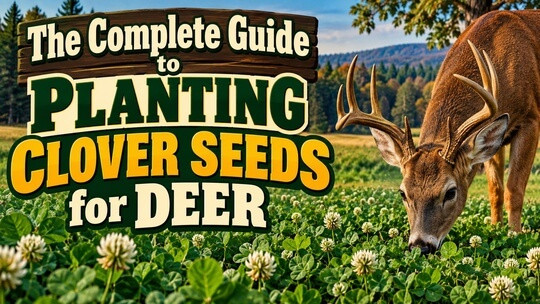
The Complete Guide to Planting Clover Seeds for Deer
Clover is one of the most popular plants for deer food plots. It produces nutritious forage, attracts deer for much of the year, and can remain productive for several seasons when properly maintained. Clover also improves the soil by fixing nitrogen, making it a valuable addition to wildlife plots, pastures, and woodland openings.
Whether you are planting a small hunting plot or several acres of deer habitat, success begins with choosing the right clover, preparing the soil, and planting the seeds at the correct depth.
Why Plant Clover for Deer?
Whitetail deer are naturally attracted to clover because its leaves are tender, palatable, and rich in protein. A healthy clover plot can provide forage during spring, summer, and fall. In milder climates, it may remain green during part of the winter.
Clover food plots offer several benefits:
- Provides nutritious forage for deer
- Attracts deer during multiple seasons
- Can grow in small or irregularly shaped plots
- Tolerates regular grazing
- Improves soil by fixing nitrogen
- Requires less fertilizer than many other food-plot crops
- Can remain productive for several years
Clover is particularly useful for small hunting properties because it can produce a large amount of forage in a relatively limited area.
Choosing the Best Clover for Deer
There are several types of clover that can be planted for deer. The best choice depends on your climate, soil, sunlight, and how long you want the plot to last.
White Clover
White clover is one of the best choices for a long-lasting deer food plot. It spreads through creeping stems and can recover from heavy browsing. Ladino clover is a large-leaved type of white clover commonly used in wildlife plots.
White clover grows best in moist, fertile soil and areas receiving at least four to six hours of sunlight each day. Under good conditions, a well-maintained stand may last several years.
Red Clover
Red clover grows quickly and tolerates a wider range of soil conditions than many white clovers. It is useful for establishing a new food plot and can produce abundant forage during its first growing season.
Although red clover is generally not as long-lived as white clover, it can remain productive for two or three years. It also handles partially shaded locations better than many other food-plot plants.
Crimson Clover
Crimson clover is an annual with attractive deep-red flowers. It establishes quickly and is often planted in the fall in southern and transitional regions.
Because it is an annual, crimson clover usually needs to reseed naturally or be replanted. It works well in mixtures with cereal grains and other cool-season plants.
Alsike Clover
Alsike clover tolerates moist and slightly acidic soil better than some other varieties. It may be useful in low areas where drainage is less than ideal. However, it is generally shorter-lived than white clover.
Annual Clover Versus Perennial Clover
Annual clovers complete their life cycle within one growing season. They establish quickly and are useful for temporary plots or seed mixtures. Crimson clover is a common example.
Perennial clovers return for multiple years when growing conditions and maintenance are favorable. White and ladino clovers are popular perennial choices.
If you want a plot that can provide dependable forage for several seasons, select a perennial clover or a mixture containing several compatible varieties. If you need rapid growth for a single hunting season, an annual clover may be more appropriate.
Select the Right Location
Clover can be planted in fields, woodland clearings, logging roads, utility rights-of-way, and other open spaces. Choose a location that deer already use or can reach without crossing heavily disturbed areas.
An ideal planting location should have:
- At least four to six hours of sunlight
- Moderately fertile soil
- Adequate moisture
- Good drainage
- A soil pH suitable for clover
- Easy access for planting and maintenance
Avoid extremely dry, sandy sites unless you can provide moisture during establishment. Clover also performs poorly in deeply shaded areas and locations that remain flooded.
Test the Soil Before Planting
A soil test is one of the most important steps in establishing a successful clover plot. Clover generally grows best when the soil pH is approximately 6.0 to 7.0.
If the soil is too acidic, clover may struggle to absorb nutrients even when fertilizer is present. Agricultural lime can raise the soil pH, but it should be applied according to soil-test recommendations. Lime may take several months to produce its full effect, so early application is helpful.
A soil test will also indicate whether phosphorus, potassium, or other nutrients are needed. Because clover fixes nitrogen, established plots generally require little or no additional nitrogen fertilizer.
When to Plant Clover Seeds
The best planting time depends on your region and whether you are frost seeding, spring planting, or fall planting.
Fall Planting
Late summer through early fall is often the best time to plant clover for deer. Cooler temperatures and autumn rainfall help seeds germinate, while weed competition is usually lower than it is in spring.
Plant early enough to allow seedlings to become established before repeated hard freezes arrive. In northern regions, this may mean planting in late summer. Southern growers can often plant later in the fall.
Spring Planting
Clover can also be planted in early spring when the soil becomes workable. Spring planting can be successful, but rapidly growing weeds may compete with young seedlings.
Prepare the site carefully and be ready to control weeds as the clover becomes established.
Frost Seeding
Frost seeding involves broadcasting clover seeds over bare or thin soil during late winter. Repeated freezing and thawing pull the small seeds into contact with the ground.
This method works best when the ground freezes at night and thaws during the day. It is commonly used to improve an existing clover plot or introduce clover into a thin stand of grass.
Prepare the Planting Area
Good seed-to-soil contact is essential. Clover seeds are small and should not be buried deeply beneath loose soil or plant debris.
Begin by removing or reducing the existing vegetation. Depending on the plot, this may involve mowing, light tilling, raking, or using another appropriate vegetation-control method.
Remove thick layers of leaves and plant residue. Smooth the soil to create a firm, level seedbed. When walking across the prepared ground, your footprints should be shallow rather than sinking deeply into the soil.
A soft, freshly tilled seedbed can cause the seeds to become buried too deeply after rain.
How to Plant Clover Seeds
Clover seeds can be spread with a handheld seeder, shoulder seeder, push spreader, or larger broadcast spreader. Because the seeds are so small, calibrate the equipment carefully.
Follow the seeding rate printed on your seed package. Recommended rates vary by clover variety, seed coating, germination quality, and whether the clover is planted alone or in a mixture.
For more even coverage, divide the seeds into two portions. Spread the first portion while walking in one direction and the second portion while walking across the plot in the opposite direction.
Do not bury clover deeply. The seeds should remain on or very close to the soil surface. After broadcasting, use a cultipacker, roller, or similar tool to press the seeds firmly against the soil. On a small plot, you can lightly rake the surface before pressing it down, but avoid covering the seeds with more than approximately one-quarter inch of soil.
Using a Seed Inoculant
Clover works with beneficial Rhizobium bacteria to collect nitrogen from the air and make it available to the plant. This process is known as nitrogen fixation.
Some clover seeds are sold pre-inoculated. If the seeds are not inoculated, purchase an inoculant intended for the type of clover you are planting. Keep inoculated seeds cool and out of direct sunlight until they are planted.
Using the correct inoculant can improve establishment, especially when clover has not recently grown in that location.
Planting Clover With a Nurse Crop
Clover is sometimes planted with a light nurse crop such as oats, wheat, or cereal rye. The companion crop can reduce erosion, provide quick forage, and help suppress weeds while the clover becomes established.
Avoid planting the nurse crop too heavily. A dense stand can shade the clover and compete for moisture. The goal is to protect the young clover without overwhelming it.
Always confirm that the companion crop is suitable for your region and planting season.
Watering a New Clover Plot
Consistent moisture is important during germination and early growth. If possible, plant shortly before a period of gentle, dependable rainfall.
Heavy rain immediately after planting can wash seeds into low areas. Extended hot and dry conditions can prevent germination or kill young seedlings.
Once established, clover is more resilient, but prolonged drought can still reduce growth and forage production.
Controlling Weeds
Weeds compete with clover for sunlight, moisture, and nutrients. Begin with a clean seedbed and monitor the plot throughout the growing season.
Mowing is one of the simplest ways to manage weeds in an established clover plot. Mow before tall weeds produce seeds, but avoid cutting the clover extremely short. Leaving several inches of growth helps the plants recover.
If herbicides are needed, use only products labeled for the clover species and target weeds in your plot. Follow every label direction carefully.
Maintaining an Established Clover Plot
A productive perennial clover plot needs regular attention. Inspect it several times during the year for weeds, bare areas, insects, poor drainage, or signs of nutrient deficiency.
Helpful maintenance practices include:
- Mowing when weeds become taller than the clover
- Testing the soil every few years
- Applying lime as recommended
- Adding phosphorus and potassium when needed
- Avoiding unnecessary nitrogen fertilizer
- Frost seeding thin areas in late winter
- Limiting vehicle traffic on wet soil
Do not mow repeatedly without a reason. Clover needs enough leaf growth to collect sunlight and store energy.
How Long Does Clover Take to Grow?
Under favorable conditions, clover seeds may begin germinating within approximately one to two weeks. Cool temperatures, dry soil, deep planting, or poor seed-to-soil contact can delay germination.
The plot may look thin during its early stages. Allow the seedlings time to develop before deciding whether reseeding is necessary. Perennial clover often becomes fuller during its second growing season.
Common Clover-Planting Mistakes
Several avoidable mistakes can lead to a thin or unsuccessful food plot.
Planting Too Deeply
Clover seeds have limited stored energy. If buried too deeply, the seedlings may be unable to reach the surface.
Skipping the Soil Test
Low soil pH is a common reason for poor clover growth. Fertilizer alone will not correct strongly acidic soil.
Using Too Much Seed
Planting extra seed does not guarantee a better plot. Overcrowded plants compete for moisture, light, and nutrients.
Applying Too Much Nitrogen
Excess nitrogen encourages grasses and weeds, which may overtake the clover.
Planting Into Thick Vegetation
Seeds must reach the soil. Broadcasting clover over dense grass, leaves, or plant residue often produces poor results.
Planting Before Dry Weather
Young clover needs moisture. Check expected growing conditions and try to plant before dependable rainfall.
Mowing Too Short
Cutting the plot extremely close can weaken the clover and expose the soil to heat and moisture loss.
Protecting a Small Clover Plot
Deer may begin browsing young clover as soon as it becomes established. Heavy pressure can damage a small plot before it develops a strong root system.
Temporary fencing, plot screens, or other barriers can protect the planting during early growth. You can also create multiple small plots to distribute feeding pressure across the property.
Larger plots generally tolerate browsing better because deer cannot consume all of the available growth as quickly.
Can Clover Be Planted in the Woods?
Clover can grow in woodland openings, but it needs sufficient sunlight. Open areas along logging roads, trails, field edges, and recently thinned woods may provide suitable conditions.
Deep forest shade is generally too dark for vigorous clover growth. Red clover may tolerate partial shade better than some white clovers, but every variety still needs several hours of light.
Removing leaves and exposing the soil is especially important when planting in wooded areas.
Should You Plant a Clover Mixture?
A mixture can provide greater adaptability than a single clover variety. One type may perform better in moist areas, while another may handle heat, grazing, or partial shade more effectively.
Choose blends designed for your climate and soil conditions. Examine the seed label so you know which varieties are included and how much of the package consists of seed coating or other materials.
Final Thoughts
Clover can create a productive and dependable food source for deer when it is planted correctly. Start with a soil test, choose varieties suited to your region, and prepare a firm seedbed with excellent seed-to-soil contact. Keep the seeds close to the surface and plant when dependable moisture is expected.
Once the plot is established, proper mowing, soil maintenance, and occasional overseeding can keep it attractive to deer for years. A carefully managed clover plot not only improves deer habitat but can also become an important part of a long-term wildlife-management plan.